Monday, October 30, 2017

Pro-Life Inspiration


Hello All,

I am back to share with you a wonderful video of a pro-life warrior for Christ, a mother of twelve children who in addition runs a pro-life center in Virginia. Mary's Shelter takes in women in crisis situations and makes it possible for desperate women to keep their pregnancies. I wanted to share this video to inspire you and help us all realize that we are not alone in this fight, that there are amazing people out there saving the unborn right now.


Thank you so much for watching. 
God bless, Magda

Saturday, October 28, 2017

Knitting Basics


Good Morning! I hope you all are having a peaceful Saturday! I wanted to give you all a prayer to start your morning with. "Lord Jesus Christ, you are the Son of God and my Savior. Inflame my heart with a burning love for you and for your mother, and with an expectant faith in your saving power. Take my life and all that I have as an offering of love for you, who are my All. Help me to do everything with love today.” Today I will be sharing with you the basics of knitting! 

Knitting Basics 

After you have your yarn and the needle size that matches it, the first step of knitting is to make a slipknot.

Slipknot
1. To make a slipknot, pull a length of yarn from your ball and twist it so it makes a loop. Then, pull a another loop of yarn from the open end of your strand through your first loop. 
2. Put one of your knitting needles through the loop of your knot and pull the strands of yarn on both sides to tighten. Make sure there is about 10-12 inches of yarn on the end that isn’t attached to your ball; you will use this length of yarn to cast on your stitches.

Casting On
Casting on is the next step in knitting. The amount of stitches you cast on for knitting will determine the overall starting width. When making a washcloth for I usually cast on about 10-12 stitches.
1. With your knitting needle in your right hand, wrap a loop of yarn from your open strand around your left thumb.
2. Put your knitting needle under the loop on your left thumb.
3. Pull a piece of the strand from the side attached to your ball of yarn over the top of your knitting needle.
4. Using your left hand, lift the loop made by your left thumb over top of the piece of yarn you just placed over it.
5. Pull your left-hand strand to tighten it. Repeat the last five steps for each stitch you want to cast on. When you’re done, there will be a little bit of yarn hanging off the end of your needle. That is supposed to be there, but if it too long you can shorten it up to about an inch or two. You’ll be able to weave it through your design or cut it off when you finish knitting. 

Knit Stitch 
We will now move on the actual knit stitch. Stitching is basically the process when you turn a ball of yarn into a length of knitted fabric.
1. With your cast-on needle in your left hand, insert your other knitting needle’s point under the first stitch at the top of your cast-on needle.
2. Bring the strand from your ball over your right-hand needle.
3. With your right-hand needle, bring your strand under and through the top stitch. With this new loop of yarn on your needle, lift the top stitch off your left needle. 
4. Pull the strand of your working yarn tight to make sure the stitch will stay. Repeat this until each stitch from your left-hand needle has been brought to your right-hand needle. Continue these steps until your fabric has reached the length you want. 

Casting Off
Casting off is the final step in knitting. It will bind off all your stitches and keeps your project from unraveling.
1. Knit two stitches onto your right-hand needle.
2. Push your left-hand needle’s point under the second stitch from your right-hand needle’s point.
3. With your left-hand needle, pull the second stitch on your right side over the first stitch.
4. Pull the second stitch off of the needle and tighten your working yarn. Now you have cast off one of your stitches. Repeat the steps of this section until all your stitches are cast off. Cut your project from your ball of yarn and knot the remaining strand through your final stitch to secure it. Cut off the excess strands from either side of your project or weave them through a few rows of stitches of your work.

That is the basic knitting process. Have a blessed Saturday! 


Wednesday, October 25, 2017

Stitch Tutorial #1 - Slip Knot and Chain Stitch

Stitch Tutorial #1 - Slip Knot and Chain Stitch

Hello Everyone! Today I will be starting the first of our crochet stitch tutorials to help give you the skills you need to make lovely baby clothes and help to make a difference to a new mother in a crisis situation. 

We will be starting with the chain stitch, the basis of almost any project. I will also include step by step instructions for the slip knot, the method you use to start a project.
These stitches are simple, and I will also have step by step instructions with pictures to help you along. If you are left handed, things will be a little more difficult, but just remember that everything is a mirror image to your own work.
Remember, getting the right tension and consistent spacing on your stitches will take time, so I would recommend finding some older, not very special yarn and doing the chain stitch for a few days, just so that you can get an idea of the way a good stitch feels. Pretty soon your stitches will look beautifully consistent and will blend together in a fabric.
Alrighty then, let's get started! 
The Slip Knot
The most important thing to do when starting a project is to make sure that you have a good slip knot. This is how you get the yarn on the hook and start your projects. 


First, take your yarn in your left hand, holding the tail between your thumb and middle finger. 


Take the yarn (not the tail) and wrap it twice around your pointer finger, starting by going over (not under) the finger. 


Take the back loop and cross it over the front loop, and then take the new back loop and bring it over the first loop and off the finger. 


Insert hook into the loop still on your finger, and pull on the tail to tighten. Viola! You have a slip knot. 

The Chain Stitch
The basis of almost any pattern, you will be using  the chain stitch all of the time. Luckily, it is also super easy, so you will get it down pat pretty quickly. In a pattern, chain stitches are usually represented by ch, followed by the number of stitches required. 
Start with a slip knot on your hook. Pay attention to how I am holding the yarn and hook in this picture. This will help you develop your tension. 


Place your hook in front of the yarn and then move it backward, hooking a loop of yarn over the hook. 
Start drawing the new loop downward to the slip knot, angling the opening in your hook inward into the stitch as you bring it through.


This is your first chain stitch, repeat as many times as necessary.

I hope that this tutorial was helpful! I will be back next week with a tutorial for the single crochet, one of the most used stitches. Happy crafting!

God Bless, Magda


Tuesday, October 24, 2017

We are the Pro-Life Generation

The Pro-Life Generation

I wanted to introduce you to one of my most favorite Pro-Life groups out there. Students for Life America is  specifically dedicated to reaching out to students in high schools and colleges throughout the US. Dubbing themselves the Pro-Life Generation, Students for Life is dedicated to informing and creating a support group and a voice on campus for all of those students who might find themselves in a crisis pregnancy. 

This group is fighting on the front lines of the war for life. These people are incredible, and I hope that we can help to support them and all of the other people who are out there actively trying to help the babies at risk of abortion.  
Thank you all for taking the steps to protect Life, in all of its forms. 
God Bless, Magda 

Monday, October 23, 2017

Love Saves Lives

Love Saves Lives: Theme of the 2018 March for Life


Earlier this month the organizers for the annual March for Life released their theme for the upcoming year, "Love Saves Lives." If you are like me the March for Life is one of the biggest ways that we pro-lifers band together to call attention to the unborn children taken by abortion, so the theme is an important message to the rest of the world as to what we are trying to accomplish. 


In the article from Catholic News Agency, March for Life president Jeannie Mancini said that "Deep down we’re all drawn towards selflessness. Choosing life, as we all know is not always easy. But it is the loving, empowering, and self-sacrificial option.”
The theme for this next year reminds us that we might be fighting a battle, but the only way we can save the children of tomorrow is by showing love to struggling pregnant mothers and compassion to those who advocate for abortion. This theme also embodies the base of our own mission on this blog.
 We want to show our love for the new mothers and babies through sweet, handcrafted gifts stuffed with as much love as they can fit. Thank you for helping us make our small contributions possible! 


God bless, Magda

Saturday, October 21, 2017

You Are The Difference

Hey y'all!  Happy Saturday!
Today I am going to start off by saying how happy I am to be given the opportunity to let the voices of all unborn children disturb my thoughts.   Happy? That is terrible and sad!  You are right in thinking that my use of the adjective is inappropriate.  It is very sad.  I am not rejoicing over the voices of unborn children, rather, I am jumping for joy at the thought that I can make a difference in the world.
I can make a difference by crocheting tiny little hats for pre-mature infants.
I can make a difference by piecing together a little pinafore.
I can make a difference by writing this article, whether or not it will affect my audience.  The point is, I am writing it and it's making a difference for me!
I find consolation in the fact that I am actively doing my best to protect life.
We live in a society where you have to be loud in order to be heard.  So many people shut out the message they need to hear and in order to get that message through, we need to have a clear, loud voice that will make a difference in that person's life.
I want to emphasize the fact that as advocates for Life, we are the voice for the those that cannot be heard.  Our mission is to pave the way for the future priests, nuns, fathers, mothers, doctors, teachers, etc, who run the risk of being aborted.   So please join me in our mission to protect and defend Life.
Be bold and be strong.


God Bless, Avi

Life Is Inspiring


Saying that there are too many children is like saying there are too many flowers.
—Mother Teresa


Share these quotes on what ever social media site you currently use.  Spread the word!  If you are an advocate for life, make it known!  Shout it out!  The world needs to hear the smallest voice and since the smallest is not able to speak, we must get the message through. 

Friday, October 20, 2017

October - Month of the Rosary

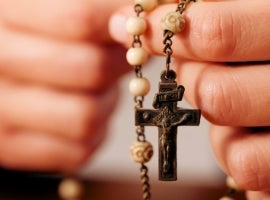
We are now in the middle of October, a month especially dedicated to Pro-Life issues and the Rosary. We also just celebrated the centennial of our Lady of Fatima, so we feel our holy Mother's presence especially right now. Her intercession and the Rosary are our most powerful tools against the evils of abortion, and it is only through supplicating our mother that we can change the world's stance on life.
We pray to our heavenly Mother that she watch over all of the victims of abortion, both mothers and babies, and that she guides women considering abortion to the right decision, the decision to choose life.
Our Lady of Fatima, pray for us!

What We Do

We are a group of young men and woman whose main goal is protecting life from conception to natural birth.   We believe it is the call of all sons and daughters of Christ to preserve human life in it's earliest forms.
"A person is a person no matter how small."  We are ready to tell the world this message in all forms.  Right now, we use crafts to show how much we care for the tiny person.  Please consider donating via email.

Thank you for your support!